
No Mantel? No Problem! Make a DIY Christmas Stocking Holder from a Thrifted Find

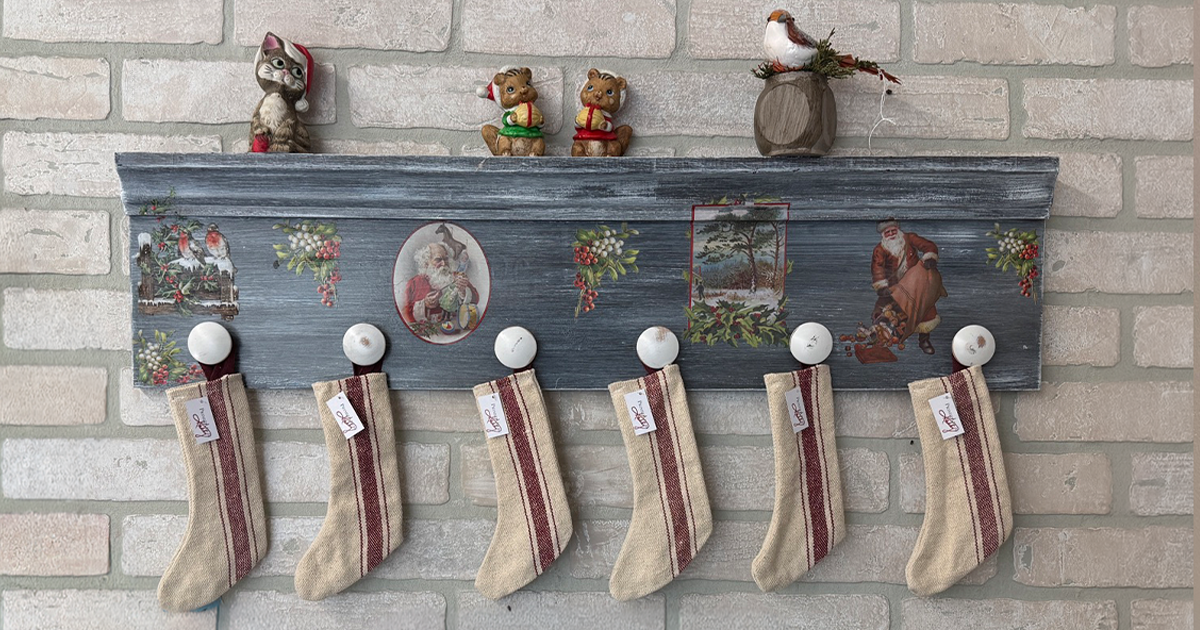
Turn an ordinary secondhand wall hook rack into a festive stocking display with paint, personality, and a little holiday magic.
Not every home has a fireplace or mantel waiting for a row of Christmas stockings. But who says you need one?
In this episode of Goodwill's Second Chance Studio, creator Jen Dunne transforms a thrifted wall hook rack into a charming Christmas stocking holder, proving that a little creativity can make even the most unexpected secondhand find feel right at home for the holidays.
With a few painting techniques, festive details, and some stockings discovered at Goodwill, Jen creates a holiday display that's both practical and full of personality.
And the best part? You can make it your own.
Watch the Full DIY Christmas Stocking Holder Tutorial
Follow along as Jen takes an ordinary thrifted find from functional wall décor to festive stocking holder, sharing simple painting techniques and creative ways to personalize your project.
What You'll Need
Start with a visit to your local Goodwill and keep an eye out for a wall hook rack, coat hanger, or small shelf with sturdy hooks.
Materials:
- Thrifted wall hook rack or coat hanger
- Furniture or craft paint suitable for your surface
- White paint for dry brushing
- Matte polyacrylic or a compatible protective topcoat
- Decorative transfers or paint markers
- Christmas stockings
- Optional thrifted holiday decorations
Tools:
- Paintbrushes
- Sandpaper or sanding block
- Screwdriver, if needed to remove the hooks or knobs
- Transfer applicator or rubbing stick, if using decorative transfers
Jen uses specialty paints and decorative transfers for her project, but you can adapt the look with materials and finishes that suit your style.
Step 1: Find Your Stocking Holder at Goodwill
The secret to this project is seeing beyond an item's original purpose.
Jen starts with a thrifted wall hook rack, the kind typically used for coats, bags, or accessories.
Its hooks make it a natural candidate for holding stockings, while the flat surface provides room for paint and decorative details.
When shopping, look for a piece with sturdy hooks, a shape you like, and enough space for your stockings.
You don't need to find the perfect color or finish. That's what the makeover is for!
Step 2: Remove the Hardware and Prep Your Piece
Before painting, Jen removes the original knobs so she can work on the background.
Her thrifted piece is made from MDF, a manufactured wood product. The paint she's using can be applied directly without sanding, stripping, or priming.
If you're using a different type of paint, check its instructions to determine whether surface preparation or primer is needed.
Keep the knobs and any screws together so they're ready to reinstall later.
Step 3: Paint and Protect the Background
Jen paints the main surface with a rich, weathered-looking color.
Once the paint dries, she applies a coat of matte polyacrylic to help protect the finish and add a subtle sheen.
This creates a base for the next decorative layer.
DIY tip: Allow each coat to dry according to the product instructions before moving to the next step.
Step 4: Create a Weathered Wood Effect with Dry Brushing
Here's where the transformation really starts to take shape!
Jen uses a technique called dry brushing to create the appearance of aged, weathered wood.
Using a small amount of white paint on her brush, she lightly feathers the color across the painted surface.
The goal isn't full coverage. Instead, the lighter color catches the surface in soft, uneven strokes, creating texture and dimension.
The result? A rustic, barnwood-inspired finish without needing an actual piece of reclaimed wood.
Step 5: Refresh and Reattach the Knobs
Jen keeps the original knobs, which already have a rustic white finish.
Rather than completely repainting them, she gives them a quick scuff sanding to reveal a little of the darker color underneath.
This helps them blend with the newly painted background.
Once she's happy with the look, she reattaches the knobs.
At this point, you could stop and have a perfectly charming stocking holder!
But Jen has a few more festive tricks up her sleeve.
Step 6: Add a Little Holiday Personality
To give her stocking holder extra character, Jen applies decorative transfers featuring Santa designs.
These transfers create the appearance of detailed artwork without requiring advanced painting skills.
She removes the backing, positions the design, and rubs it onto the surface using the included applicator.
Then she applies another protective topcoat to seal the finished design.
Make it your own: Don't have decorative transfers? Use a paint marker to write family members' names above the hooks, add simple holiday illustrations, or create a design that works with your seasonal décor.
Step 7: Hang Your Stockings and Style the Display
Once everything is dry, it's time for the holiday reveal!
Jen hangs stockings she also found at Goodwill and uses the small ledge along the top of her hook rack to display a few Christmas decorations.
The result is a cozy holiday vignette made almost entirely from secondhand treasures.
Before hanging your finished piece, make sure it's securely mounted using appropriate hardware. Keep stockings lightweight and avoid overloading the hooks or shelf.
A Little Secondhand Magic Goes a Long Way
One of the best things about thrifting is discovering possibilities you weren't necessarily looking for.
A wall hook rack becomes a stocking holder. A few secondhand decorations become a festive display. And an ordinary find gets a whole new reason to shine.
Whether your holiday style is rustic, colorful, whimsical, or somewhere in between, this project is an easy way to bring a little creativity into your seasonal decorating.
So the next time you're browsing Goodwill, take another look at those shelves and hooks.
Your next holiday tradition might be hiding in plain sight.
Ready for more secondhand inspiration? Explore Goodwill's Second Chance Studio for more creative DIY projects and thrift flips that give everyday finds a second chance.