
How to Make a DIY Witch Hat and Painted Halloween Handbag
-2.png?sfvrsn=d79aee4_1)
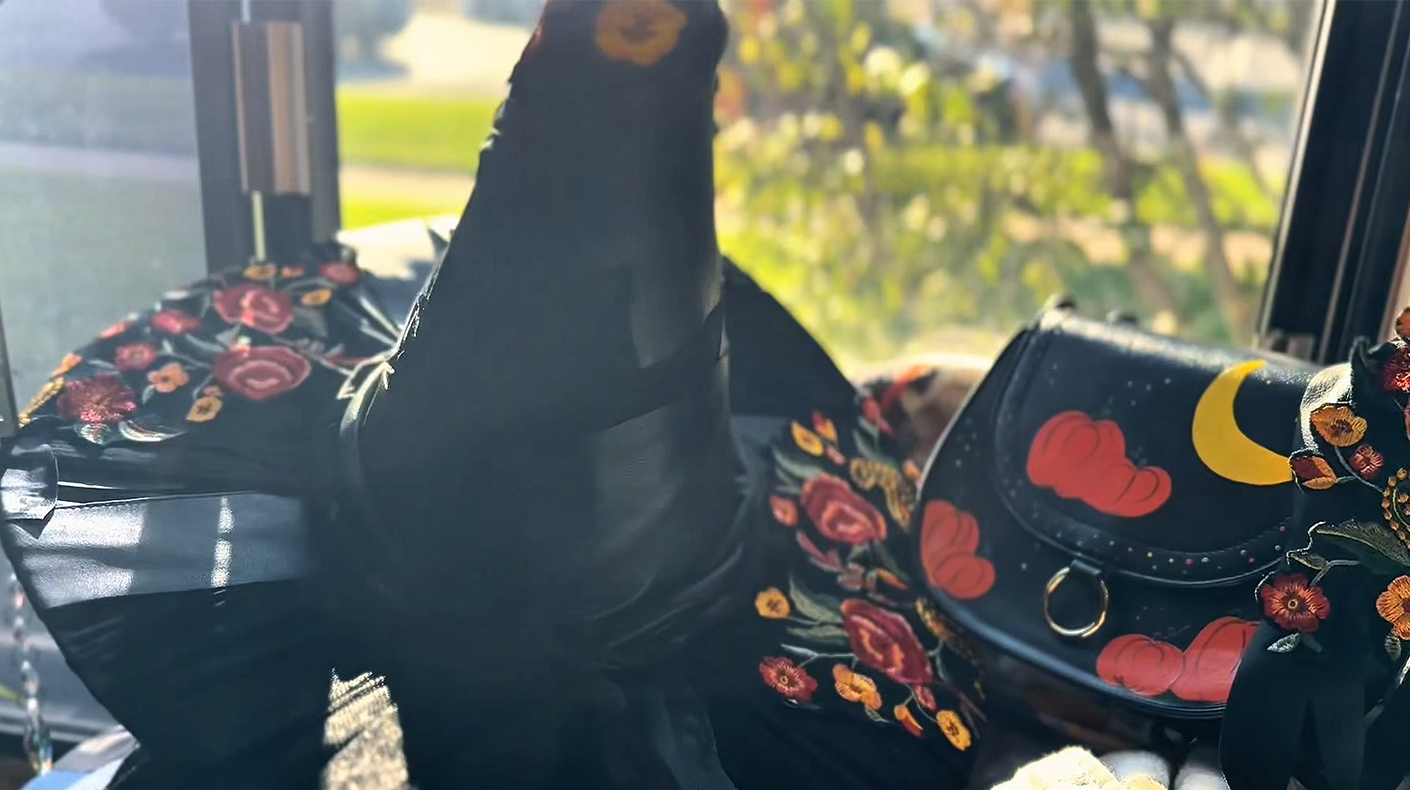
Not every Halloween look needs a full costume.
Sometimes, a couple of statement accessories are all it takes to get into the spooky spirit.
In this episode of Second Chance Studio, Shelby Schaper takes on two thrifted Halloween DIYs: a no-sew witch hat made from repurposed clothing and a secondhand handbag transformed with festive painted details.
Together, they're an easy way to give your favorite outfit a little Halloween personality—whether you're heading to a party, exploring the city or enjoying Chicago's Arts in the Dark Parade.
Watch the Halloween Accessories Come Together
See how thrifted fabrics, unexpected materials and a little creativity become two Halloween accessories you can make your own.
What You'll Need
For the no-sew witch hat:
- Thrifted clothing, fabric or textiles in different textures
- Sturdy, lightweight material for the hat structure, such as placemats or poster board
- Fabric scissors
- Measuring tape
- Tape
- Hot glue gun and glue sticks
- Optional embellishments like ribbon, lace, silk flowers, jewelry or belts
For the painted Halloween handbag:
- A thrifted handbag with a smooth leather surface
- Leather paint in your preferred colors
- Leather preparer and deglazer
- Leather-compatible matte finisher
- Pencil or other suitable marking tool
- Paintbrushes
- Optional leftover fabric or leather strips for a bag charm
Materials note: Shelby uses Angelus leather paint, preparer/deglazer and matte finisher. Choose products appropriate for your bag's actual material, and follow the manufacturer's preparation, application and drying instructions.
DIY #1: Make a No-Sew Witch Hat From Thrifted Finds
Step 1: Shop for Fabric With Personality
The best part of making your own witch hat? You don't have to settle for one fabric or style.
Look for thrifted clothing with interesting textures, patterns and details you can reuse. Think embroidered flowers, lace sleeves, faux leather, velvet or lightweight fabrics that can be layered.
Try choosing pieces that offer multiple usable materials. A dress might provide fabric and lace, while a duster could offer embroidered embellishments for decorating.
And don't skip the other aisles. Jewelry, ribbons, belts and silk flowers can all become unexpected hat accessories.
Step 2: Build Your Hat Base
Start by measuring around your head where you want the hat to sit.
Choose a sturdy but lightweight material to create the brim and cone. Thrifted placemats, old signs or other flexible materials may work, depending on their structure.
For an oversized brim, you can join two pieces together with tape before cutting out the center opening.
Next, roll another piece of material into a cone. Adjust the height and width until you're happy with the shape, secure it with tape and trim away the excess.
DIY Tip: Want a dramatic, floppy witch hat? Experiment with the brim size before attaching the fabric. The base determines the final silhouette.
Step 3: Wrap the Hat in Thrifted Fabric
Cut your fabric into long strips to make wrapping and layering easier.
Working in sections, attach one end of a fabric strip with hot glue, wrap it around the brim and secure the other end.
Repeat for the cone, turning the hat as you work to check for gaps.
Mixing different fabrics adds dimension, while contrasting textures can make the finished hat feel more custom.
Step 4: Connect the Brim and Cone
Once both sections are covered, use hot glue to attach the cone to the brim.
Reinforce the connection with additional fabric underneath, then cover the visible seam with another strip of fabric.
Allow the glue to cool and check that the structure is secure before wearing.
Step 5: Make It Your Own
Now comes the fun part.
Use embroidered details, ribbons, lace, faux leather or other thrifted embellishments to decorate your hat.
There are no strict rules here. Go dramatic, whimsical, vintage-inspired or somewhere in between.
Let your thrift finds determine the final design.
DIY #2: Paint a Thrifted Halloween Handbag
A plain handbag can become a statement accessory with a little planning and the right paint.
Step 1: Choose the Right Bag
Look for a handbag with a smooth surface that's suitable for painting.
Before purchasing supplies, identify whether the bag is genuine leather, faux leather or another material. Different surfaces may require different preparation and paint products.
A simple bag with plenty of uninterrupted space gives you room to experiment with your design.
Step 2: Plan Your Halloween Design
Lightly sketch your design onto the handbag to establish where everything will go.
Pumpkins, moons, stars, ghosts, candy and jack-o'-lanterns are all possibilities.
For a look that works beyond Halloween night, try seasonal designs that can carry you through the rest of fall.
And don't worry about being an expert artist. Simple shapes can make a big impact.
Step 3: Prepare the Surface
Before painting, follow the preparation instructions for your chosen leather paint.
Shelby uses a leather preparer and deglazer to remove the existing finish from her bag and help the paint adhere.
Allow the surface to dry as directed before continuing.
Step 4: Add a Base Coat
Painting bright colors onto a dark handbag? A white base can help those colors stand out.
Apply thin coats of white leather paint to the areas you plan to decorate, allowing each coat to dry as directed.
Building up the base gradually can create a more even surface for your final colors.
Step 5: Paint Your Design
Once the base is ready, add your chosen colors.
For this project, pumpkins and a moon create the main design, with stars and polka dots adding a little extra personality.
Work in thin layers and let the paint dry between coats.
Step 6: Seal Your Artwork
After the design has fully dried according to the paint manufacturer's instructions, apply a compatible finisher.
A matte finish can help protect the painted design while keeping the overall look understated.
Bonus DIY: Make a Matching Bag Charm
Have leftover fabric, leather strips or embroidered details from your witch hat?
Put them to work again.
Tie or attach small embellishments to leftover strips to create a decorative charm for your handbag. Secure the pieces together and attach the finished charm to the bag's handle or hardware.
It's an easy way to connect both projects without needing everything to match perfectly.
Halloween Style Without the Full Costume
Not interested in spending the night in an elaborate costume? You can still dress for the occasion.
Pair your DIY witch hat and painted handbag with a favorite dress, jeans, boots or an outfit you already love.
These kinds of accessories are especially fun for events like Chicago's Arts in the Dark Parade, where you can embrace the Halloween atmosphere without committing to a head-to-toe costume.
And because you're creating with secondhand materials, your finished pieces can be just as unique as the finds that inspired them.
A little thrifted creativity can go a long way.
Ready to make something spooky?