
How to Make DIY Farmhouse Fabric Ghosts With Thrifted Finds
-2.png?sfvrsn=d79aee4_1)
Halloween crafting season has officially entered the chat—and we're making ghosts a little bougier.
In this episode of Second Chance Studio, Jen Dunne transforms unexpected Goodwill finds into DIY fabric ghosts with a little French country flair. A mannequin head, candlestick and thrifted fabric come together for the main project, with enough leftover material to inspire two more Halloween DIYs.
The best part? There's no perfect formula. Different fabrics, thrifted bases and a little experimentation can give each ghost its own personality.
Watch the Thrifted Halloween Transformation
See how a few unexpected Goodwill finds become DIY fabric ghosts, miniature ghost ornaments and one completely spontaneous bonus project.
What You'll Need
Depending on which projects you make, gather:
- Thrifted fabric
- A thrifted mannequin head or another form for your larger ghost
- A candlestick or similar base
- Scissors
- Hot glue gun
- Plenty of glue sticks
- Oil-based paint marker or permanent marker
- Polyfill
- Twine
- A small Halloween tree, optional
- A small terracotta pumpkin or similar thrifted piece for the bonus mummy
Thrift Tip
Don't limit yourself to the Halloween aisle.
Fabric and materials can turn up throughout the store, sometimes in forms you weren't expecting. A table runner might become craft fabric. A candlestick could become the base of a decoration. And something you thrift without an immediate plan might become exactly what you need for a future project.
Shop for potential, not just purpose.
DIY #1: Make a Bougie Fabric Ghost
Step 1: Build Your Ghost Form
Start by creating the structure that will give your ghost its height and shape.
For this version, a thrifted mannequin head and candlestick create the base—but your ghost doesn't need to use the exact same pieces. Look for secondhand objects that can provide the shape, height and stability you want.
Step 2: Drape Your Fabric
Place your fabric over the form and decide how you'd like your ghost to fall.
There's no exact measurement here. Try a shorter silhouette or let the fabric flow farther down the base. Once you're happy with the length, trim away excess fabric and any unwanted edges.
Step 3: Give Your Ghost Some Shape
If you want more dimension, create small pleats in the fabric and secure them with hot glue.
This step is completely optional. Leave the fabric loose and flowing or add folds until your ghost has the shape and movement you like.
Step 4: Add the Face
Finish your ghost by drawing on eyes with an oil-based paint marker.
And just like that: bougie ghost acquired.
DIY #2: Make Mini Fabric Ghost Ornaments
Have extra fabric? Don't throw it away.
Cut a smaller piece of fabric and place a little polyfill underneath the center to form the ghost's head.
Gather the fabric beneath the polyfill and tie it with twine. Then attach another small piece of twine with hot glue to create a hanger.
Add eyes and a mouth using an oil-based paint marker or permanent marker.
Jen hangs hers from a thrifted Halloween tree, but these mini ghosts could also become decorations throughout your home—or even hang outside from tree branches.
And because they're so simple to assemble, this is also an easy Halloween craft to make with kids.
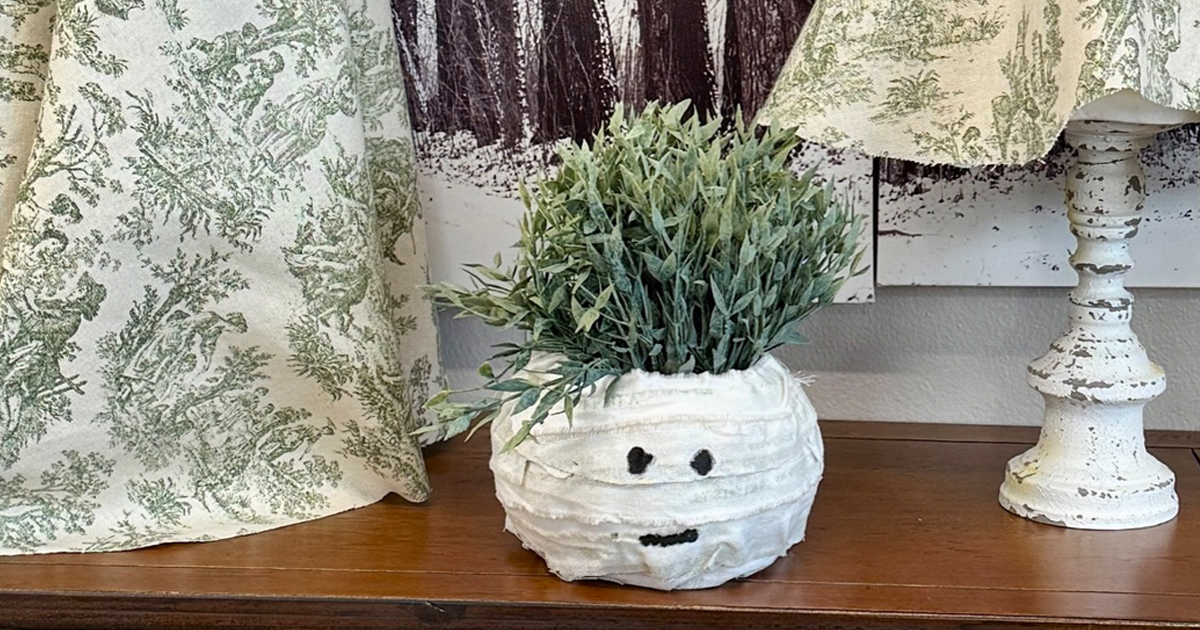
DIY #3: Turn the Scraps Into a Mummy
This one wasn't even part of the plan.
After trimming the fabric for her ghosts, Jen looked at the scraps left on her worktable and decided they weren't finished yet.
Using a small terracotta pumpkin as her base, she wraps and overlaps strips of leftover fabric around it, securing them with hot glue as she goes.
Continue layering until the original surface is covered, then add eyes and a mouth.
One project's scraps just became another project's supplies.
Let Your Thrift Finds Decide the Project
One of the best things about upcycling is that you don't always need to walk into Goodwill knowing exactly what you're going to make.
Jen had thrifted some of these materials years before this project. The fabric didn't have a designated purpose when she bought it—she simply knew it had potential.
Eventually, it became a ghost. Then several ghosts. And then its scraps became a mummy.
That's the thrill of the hunt: the selection is different every time, and sometimes the best project starts with finding something interesting and asking, “What if?”
Ready to see what inspires your next Halloween DIY?