
How to Turn Skinny Jeans Into Wide-Leg Pants
-2.png?sfvrsn=d79aee4_1)
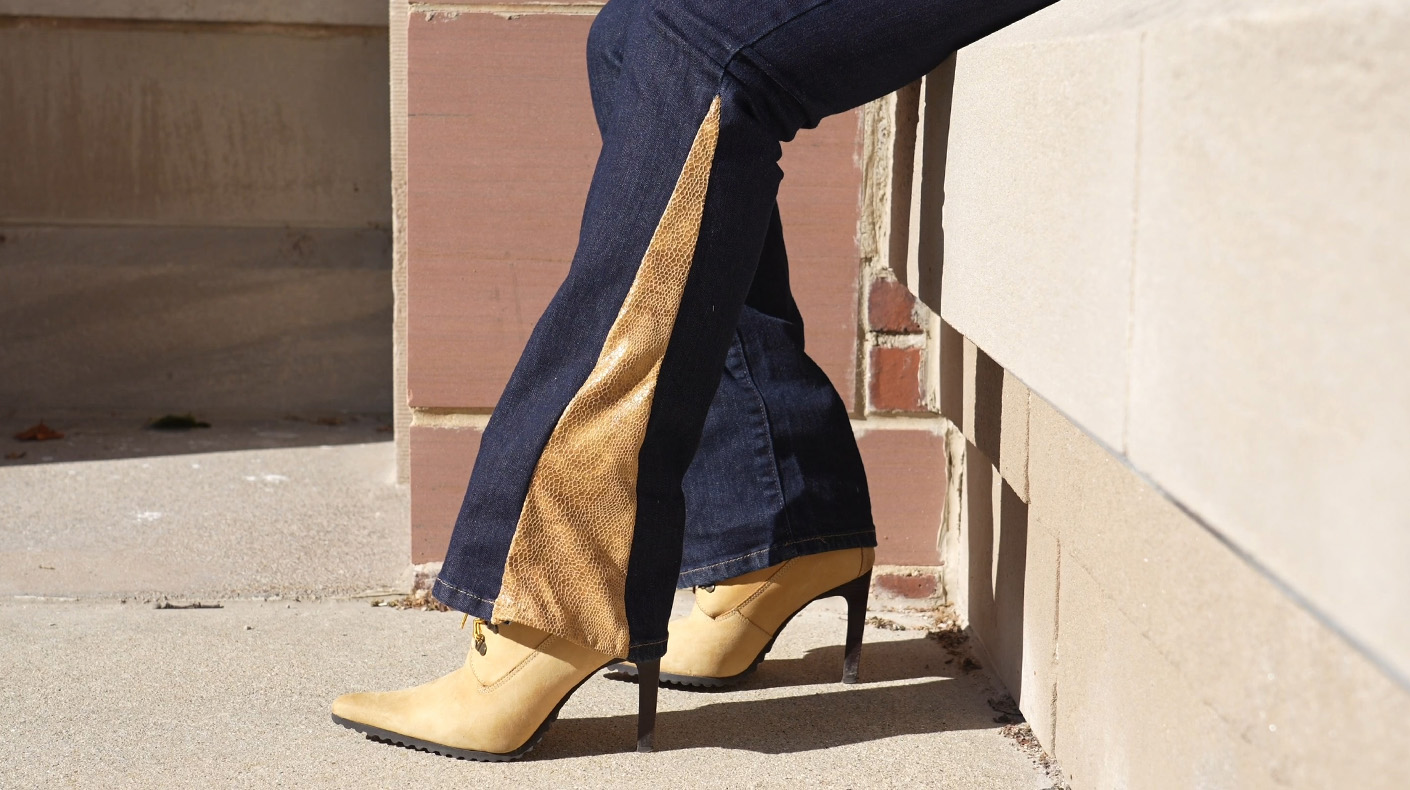
Skinny jeans hiding in the back of your closet? Don't count them out just yet.
Sometimes the best thrift flip starts with finding a piece that’s almost perfect.
For this Second Chance Studio project, Nohemi of Moda Libré headed to Goodwill looking for a pair of jeans that fit just right through the waist and hips. She found them—but the leg opening wasn’t quite the silhouette she wanted.
Instead of passing them up, she saw an opportunity.
Using contrasting fabric from a second thrifted garment, Nohemi transforms the fitted jeans into statement-making wide-leg pants with custom inserts that add movement, color and texture.
Two Goodwill finds. One completely new look.
Watch the Full Transformation
See how Nohemi opens the legs of a pair of skinny jeans, creates custom inserts from a second thrifted garment and sews everything together for a completely new silhouette.
What You'll Need
- A pair of skinny or slim-fit jeans
- A second thrifted garment with enough usable fabric for the inserts
- Seam ripper
- Fabric scissors
- Measuring tape
- Ruler
- Fabric chalk or marking tool
- Straight pins or sewing clips
- Sewing machine
- Coordinating thread
- Serger, optional
Thrift Tip: When you're shopping for the second piece, don't worry about whether you'd actually wear it as-is. You're shopping for fabric. Look for enough uninterrupted material to create two long panels, plus a color and texture that work with your denim.
Step 1: Choose Your Jeans
Start with a pair of skinny or slim jeans that fit well through the waist and hips.
The goal isn't to reconstruct the entire pair of pants. Instead, you're keeping the fit you already like at the top and creating more room and movement through the lower leg.
Before cutting anything, try your jeans on and decide where you want the new silhouette to begin.
Step 2: Open the Lower Legs
Lay the jeans flat and begin opening the seam along each lower pant leg.
Work carefully with your seam ripper and scissors so you're removing the stitching without unnecessarily cutting into the denim you'll need later.
How high you open the seam will determine where your contrasting insert begins—and how dramatic the finished shape becomes.
Step 3: Determine the Size of Your Insert
Spread the opened pant leg until you reach the width and shape you want for your finished pants.
This opening becomes your guide for the contrasting panel.
Measure the length of the opening and determine how wide you want the panel to become toward the hem. Then transfer those measurements to your donor garment.
DIY Tip: Before cutting your second garment, double-check your measurements and remember to leave enough additional fabric for your seam allowance.
Step 4: Turn a Second Thrifted Find Into Fabric
Now it's time for the second half of the thrift flip.
Lay your donor garment flat and identify the largest usable sections of fabric. Nohemi uses a thrifted tan jacket, creating a contrast in both color and texture against the dark denim.
Using a ruler and marking tool, draw the shape of your insert onto the fabric.
Cut your first panel, then use it as a guide to create a matching piece for the other leg.
This is where shopping beyond your usual size—or even your usual department—can pay off. You're not looking for a jacket anymore. You're looking for material.
Step 5: Position and Pin the Panels
Turn the jeans as needed so you can work cleanly along the opened seams.
Position one contrasting panel inside the opening of the first pant leg, making sure the fabric reaches from the top of the opening through the hem.
Pin or clip the fabrics together, checking as you go that the panel is lying flat and that the edges line up properly.
Repeat on the second leg.
Before sewing, lay both pant legs next to each other and compare them. This is your chance to adjust the panels so the finished design feels balanced.
Step 6: Sew the Inserts Into Place
Using your sewing machine, stitch each side of the contrasting panel to the denim.
Take your time around the point where the new panel meets the original seam. That's where the alteration needs to transition smoothly from the original skinny silhouette into the wider leg.
Continue down each side until the entire insert is secured.
Nohemi also finishes the interior edges during construction. If you don't have a serger, use the seam-finishing method that works best with your machine and fabric.
Step 7: Finish the Hem
Once both inserts are attached, turn your attention to the bottom of each pant leg.
Fold and secure the raw edges of the contrasting fabric so they align cleanly with the existing denim hem, then stitch them into place.
Check both legs for loose threads and make sure all of your new seams are secure.
Then comes the important part:
Try. Them. ON.
Make the Silhouette Your Own
The beauty of this thrift flip isn't just rescuing a pair of skinny jeans from the back of the closet. It's realizing that the silhouette isn't permanent.
A contrasting insert can add width, movement, color and texture without rebuilding an entire pair of pants from scratch.
And your secondhand fabric doesn't have to look like Nohemi's. Try denim-on-denim for something subtle. Add suede-like texture for contrast. Go bold with a print or unexpected color. You could even find another pair of jeans and combine two washes into one.
Start with what fits. Find something unexpected. Then make the two work together.
Visit your local Goodwill Store & Donation Center to find the pieces for your next thrift flip.