
How to Make a Hobo Bag from a Thrifted Leather Jacket
-2.png?sfvrsn=d79aee4_1)
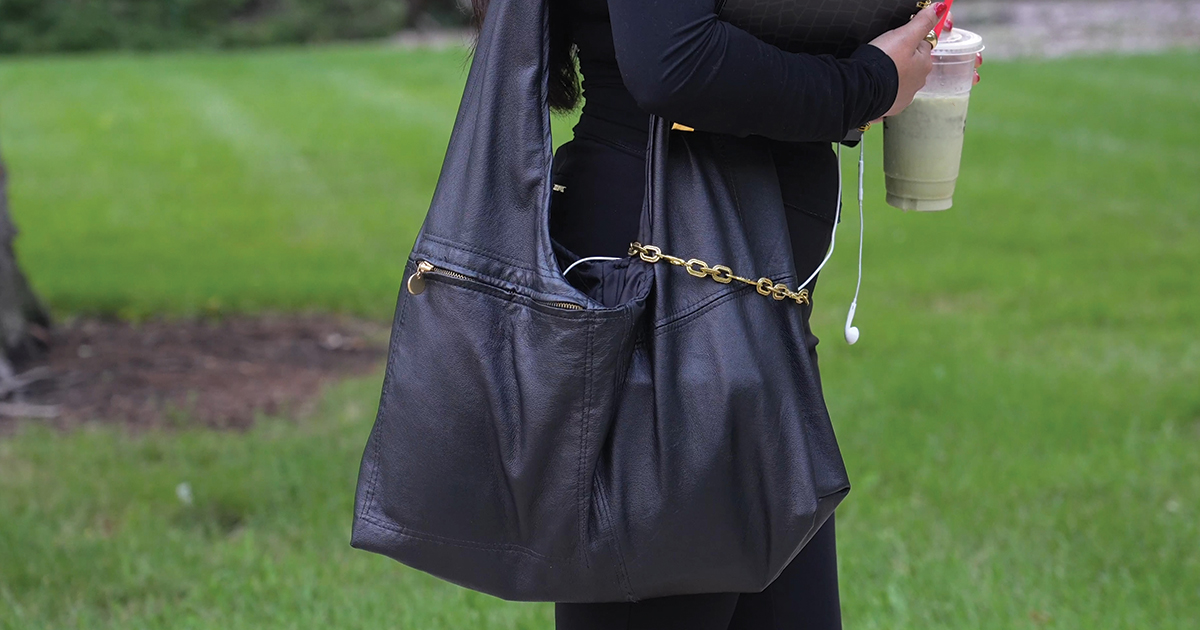
The perfect bag might be hanging in the jacket section.
Hobo bags are spacious, slouchy and easy to carry, making them a natural match for today's relaxed styles. And with the right thrifted find, you can create your own using something that already exists.
This DIY transforms an oversized leather jacket from Goodwill into a chic, lined hobo bag—with no pattern required.
Watch the Full Tutorial
Want to see the transformation from thrifted jacket to finished bag? Watch the full tutorial to follow the process step by step, including how to choose the right thrifted garment, measure and cut your pieces, construct the lining and bring the entire bag together.
What You'll Need
- Thrifted leather jacket
- Seam ripper or blade
- Fabric marking tool
- Measuring tape or ruler
- Curved ruler (optional)
- Fabric clips or pins
- Scissors or cutting tool suitable for leather
- Sewing machine
- Thread
- Hand-sewing needle
- Iron or pressing tools appropriate for your material
Thrift Tip: Look for an oversized jacket with plenty of usable material and minimal seams or embellishments. Leather works beautifully for this project, but other sturdy materials like denim, canvas or corduroy can work, too.
Step 1: Plan Before You Cut
Start by looking at your thrifted jacket as material rather than a finished garment.
Study the panels, seams, lining, hardware and other details to determine which areas can become the front, back and strap of your bag. Planning before cutting can help you preserve larger pieces of material and minimize waste.
Carefully deconstruct the jacket using a seam ripper or blade, separating the outer shell from the lining. Keep both—you can reuse the jacket's original lining for the inside of your new bag.
Step 2: Measure the Base of the Bag
Working on one side of your exterior material, begin outlining the bag.
- Draw a 7½-inch horizontal line along the bottom.
- From the end of that line, measure 2½ inches up.
- Draw a 4-inch horizontal line across. This will create the center section of the base.
- From the opposite end of that line, measure 2½ inches down.
- Finish with another 7½-inch horizontal line.
The finished base should create a shallow, stepped shape that will eventually give the bag dimension.
Step 3: Create the Sides and Strap
From each end of your base, measure 12 inches up to create the sides of the bag.
Next, find the center point of the base and measure 29 inches up for the strap. If you'd prefer a shorter strap, adjust this measurement to fit your desired length.
At the top, draw a 4-inch horizontal line for the width of the strap.
Connect the body of the bag to the top of the strap using slightly curved lines. You can freehand the curves or use a curved ruler for more precision. Repeat the shape on the opposite side.
Step 4: Add Your Seam Allowance and Cut
Add a ½-inch seam allowance around the entire outline before cutting.
You'll need a front and back exterior piece. Depending on the size and construction of your thrifted garment, you may be able to cut each as one continuous piece or need to join smaller sections together.
Repeat the same shape using your lining material.
Step 5: Sew the Exterior
Place the front and back pieces together with the right sides facing each other.
Clip or pin the pieces in place and sew along the side seams. Then connect and sew the bottom edges.
Bring the corners of the base together and sew directly across each one. This creates the shape and depth at the bottom of your bag.
Step 6: Create the Lining
Use your exterior bag pieces as a guide to create the lining.
If your thrifted jacket has a usable lining, repurpose it here for an even more resourceful thrift flip.
Sew the lining pieces together using the same basic construction as the exterior, but leave an opening at the bottom large enough to pull the finished bag through later.
Step 7: Join the Exterior and Lining
Turn the lining inside out and place the exterior bag inside it.
Line up the edges, clip or pin everything together and sew around the opening.
Reach through the opening you left at the bottom of the lining and carefully pull the entire bag through. Straighten the edges and topstitch around the opening of the bag to help keep the lining securely inside.
Step 8: Finish the Strap
Bring the two exterior ends of the strap together and sew straight across to create one continuous strap.
For the lining, fold the raw edges inward and handstitch them closed. Don't forget to handstitch the opening at the bottom of the lining, too.
And that's it—you've turned a thrifted jacket into a completely new accessory.
The finished hobo bag has plenty of room for everyday essentials and an easy silhouette that can go from work or class to errands, coffee dates and weekend plans.
Visit your local Goodwill Store & Donation Center and start hunting for the materials for your own thrift flip.
Remember: Don't just ask, "Would I wear this?"
Ask, "What could I make with this?"