
How to Make a One-of-a-Kind Concert Outfit With Thrifted T-Shirts and Flannel
-2.png?sfvrsn=d79aee4_1)
Thrift, Cut, Sew Two Thrifted Finds Into a Concert Look No One Else Has
Want a one-of-a-kind concert outfit without spending a fortune? Before you start searching for something new, your next concert look might already be waiting at Goodwill.
For this Second Chance Studio project, Jenny Smith of Starline and Santorini transforms a thrifted graphic T-shirt and coordinating flannel into a custom concert shirt perfect for festivals, tailgates and live music all year long.
The best part? You don’t need to be an expert at sewing. With a little cutting, ironing and beginner-friendly stitching, two secondhand finds can become one completely original look.
Watch the Full Tutorial
Watch the full video to follow the transformation step by step, get Jenny’s helpful tips and see how to turn two thrifted shirts into your own wearable work of art.
Start With the Perfect Thrifted Finds
Every one-of-a-kind concert look starts with the hunt.
Begin with a graphic T-shirt that speaks to you. Look for a favorite artist, team, destination or design that fits the vibe of your next event. Then, search for a flannel or button-down shirt that complements the colors and gives the graphic enough room to shine.
When thrifting for this project, look for:
- A graphic T-shirt featuring a favorite artist, team, destination or design
- A flannel or button-down shirt in coordinating colors
- A shirt with enough open space on the back for your graphic
- Pieces that are comfortable enough to wear, layer or tie around your waist
Don’t be afraid to shop outside your usual section. An oversized men’s flannel might be exactly what your project needs.
Once you bring your thrifted finds home, wash and dry everything before you begin.
What You’ll Need
To create your own DIY concert flannel, gather:
- One thrifted graphic T-shirt
- One thrifted flannel or button-down shirt
- Scissors
- An iron
- Ironing mat, folded towel or blanket
- Cutting mat
- Rotary cutter or fabric cutting tool
- Adhesive webbing
- Parchment paper
- Ruler
- Sewing machine
- Thread
You don’t need fancy equipment for this project. A standard household iron and a sewing machine with a basic straight stitch will do the job.
Step 1: Cut Out Your T-Shirt Design
Begin by cutting along the sides and top of the T-shirt to separate the front graphic from the back.
Iron the fabric flat, then trim the graphic into its final shape. When possible, leave approximately one inch of extra fabric around the design. This gives you enough room to stitch the panel onto the flannel while leaving a visible border.
Jenny’s Tip: Don’t let slightly uneven measurements stop the project. One side of Jenny’s graphic ended up closer to the edge than she planned, but once the finished piece came together, she never noticed it again.
Your project doesn’t have to be perfect to be one of a kind.
Step 2: Position the Graphic
Lay the flannel flat and iron the back to create a smooth surface.
Position the T-shirt graphic on the back of the shirt. About six to seven inches below the collar can be a good starting point, but the right placement will depend on the size of your flannel and graphic.
Measure from both sides to help center the panel, then step back and look at the placement before attaching anything. A few extra minutes here can save you from repositioning the design later.
Step 3: Secure the Design With Adhesive Webbing
Once you’re happy with the placement, add adhesive webbing beneath the edges of the T-shirt panel.
Working one side at a time, use your iron to secure the graphic to the flannel.
Jenny’s Tip: Place parchment paper between the iron and the T-shirt design. Because you may not know how a secondhand graphic was originally printed, this protective layer can help prevent color or parts of the design from transferring onto your iron.
After securing all four sides, go over the edges once more to make sure nothing lifts while you sew.
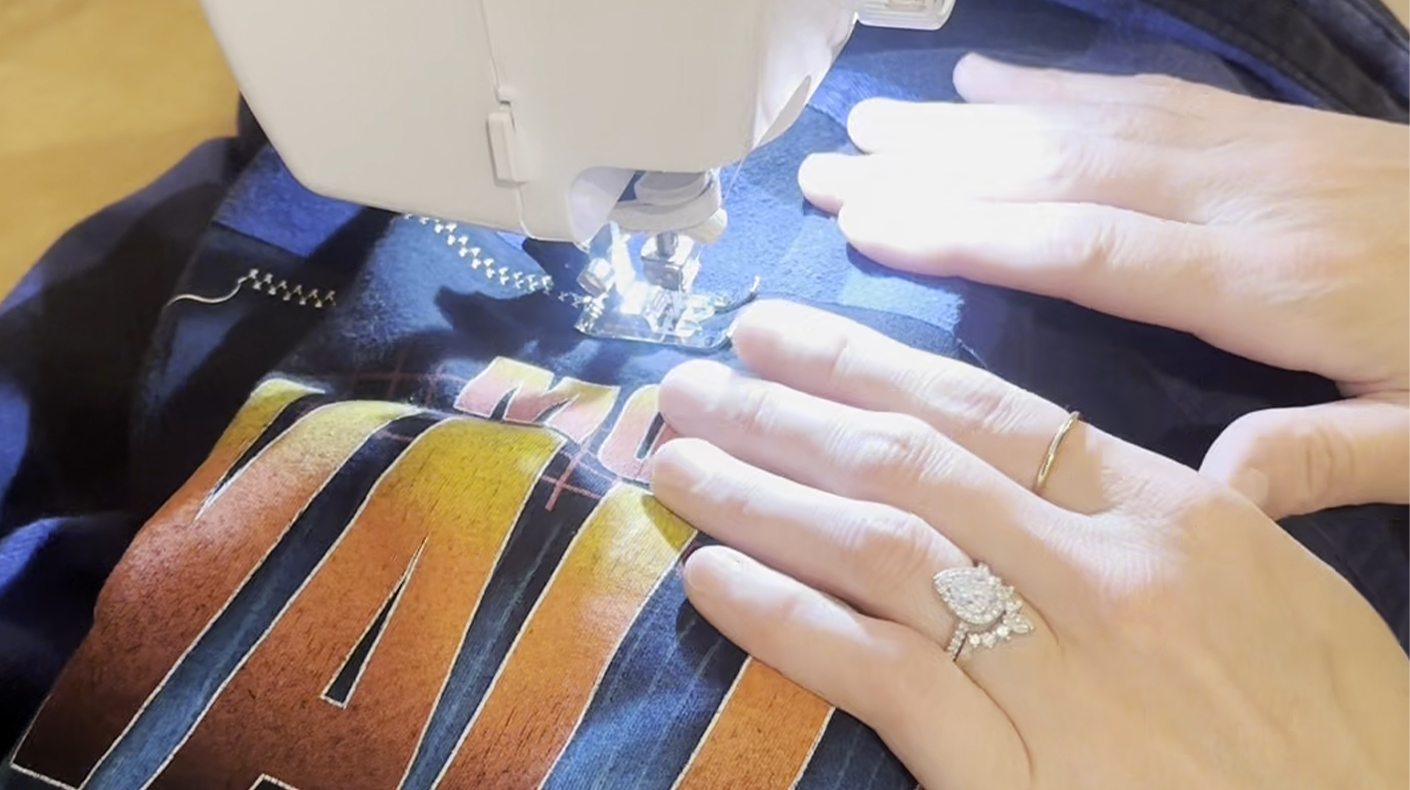
Step 4: Sew the T-Shirt Panel to the Flannel
Now for the part that can seem intimidating — but it doesn’t need to be.
Using a sewing machine, stitch around all four edges of the T-shirt panel. A simple straight stitch works perfectly, so there’s no need for an advanced machine or decorative pattern.
In fact, the sewing can be one of the fastest parts of the entire project.
Once all four sides are secure, trim any excess thread and your custom concert flannel is ready to wear.
Style Your DIY Concert Look
One of the best parts about this project is its versatility.
Wear your flannel:
- Open over your concert outfit
- Buttoned as a statement piece
- Layered when the temperature drops
- Tied around your waist while still showing off the back design
That last option is especially helpful for summer concerts and festivals. You can show off your custom creation without wearing an extra layer in the heat, then throw it on when the temperature cools down at night.
Make Your Next Concert Look One of a Kind
Whether you’re heading to a concert, festival or tailgate, creating your own look is a fun way to give secondhand clothing a new life.
Start with the piece that catches your eye. Find colors that work together. And don’t worry if every cut or stitch isn’t perfect. That’s part of what gives your finished piece its character.
Ready to create your own concert outfit? Visit Goodwill of Greater Milwaukee & Chicago to search for the thrifted pieces that can inspire your next DIY.
If you create your own concert flannel, share your finished look and tag Goodwill of Greater Milwaukee & Chicago. We’d love to see where your creativity takes you.
Every item deserves a second chance.