
How to Make DIY Chalkboard Wine Glasses for Weddings, Showers & Parties
-2.png?sfvrsn=d79aee4_1)
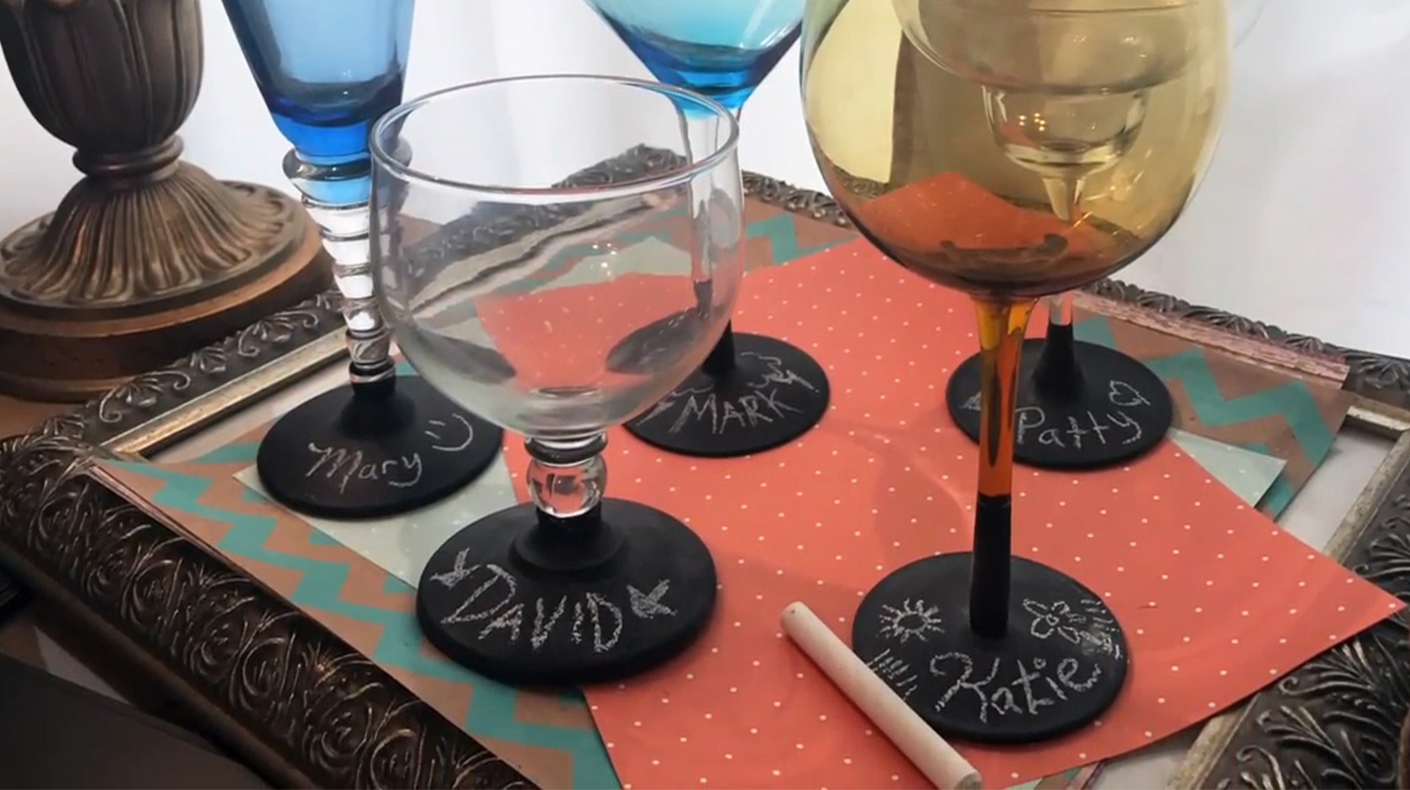
Personalized Party Decor Starts with Thrifted Glassware
The best party details are the ones that feel personal.
Whether you’re planning:
- a wedding
- bridal shower
- bachelorette party
- rehearsal dinner
- birthday celebration
…custom drinkware instantly makes the experience feel elevated and memorable.
And the best part? You don’t need expensive custom glasses to make it happen.
This easy DIY transforms thrifted glassware into personalized chalkboard wine glasses that guests can write on, customize, and even take home after the celebration.
Watch the Full Tutorial
Watch the quick Second Chance Studio tutorial to see how thrifted glassware becomes custom party decor in just a few simple steps.
Supplies You’ll Need
- Thrifted wine glasses or stemware
- Rubbing alcohol
- Chalkboard paint
- Paint brush
- Painter’s tape
- Resealable container
- Plastic bag
- Chalk dust or chalk sticks
- Chalk markers (recommended for cleaner lettering)
- Protective covering for your workspace
Start with Thrifted Glassware
One of the easiest ways to save money on wedding or party decor is by thrifting glassware.
Mixing different styles of:
- wine glasses
- champagne flutes
- cocktail glasses
can actually make your tablescape feel more curated and unique.
For this project, only the stems and bases of the glasses are painted—keeping the drink area untouched while adding a fun customizable detail.
Step 1: Clean the Glasses Thoroughly
Before painting:
- Clean the stem and base with rubbing alcohol
- Remove dust, fingerprints, and residue
- Allow the glasses to fully dry
This helps the paint adhere more evenly and smoothly.
Step 2: Tape Off Your Design Area
If you want clean, crisp paint lines:
- Wrap painter’s tape around the stem
- Mark where you want the painted section to begin and end
This simple step helps create a more polished final look.
Step 3: Apply the First Coat
Using chalkboard paint:
- Apply an even first coat to the lower part of the glass
- Avoid applying the paint too heavily
- Watch for drips as the glasses dry
Once coated:
- Turn the glasses upside down
- Allow them to dry completely
To help keep brushes soft between coats:
- Seal brushes in a plastic bag
- Cover leftover paint in a resealable container
Step 4: Add Additional Coats
Once the first coat dries:
- Remix the paint
- Apply a more generous second coat
Most glasses will need 2–3 coats for full coverage
Allow each layer to dry fully before continuing.
Step 5: Prep the Chalkboard Surface
Before writing on the glasses:
- Rub a light layer of chalk dust across the painted area
This helps “set” the chalkboard surface and makes it easier to write on later.
Step 6: Personalize Your Glasses
Now comes the fun part.
Use the glasses for:
- Guest names
- Drink labels
- Bridal party titles
- Wedding seating markers
- Party messages
While traditional chalk works, chalk markers are a great option if you want:
- cleaner lettering
- easier readability
- more polished designs
Especially for weddings or formal events, chalk markers can help the final look feel a little more elevated and less messy.
Perfect for Weddings & Celebrations
These DIY chalkboard glasses are perfect for:
- Weddings
- Bridal showers
- Bachelorette parties
- Rehearsal dinners
- Cocktail parties
- Holiday gatherings
And because they’re reusable, guests can continue using them long after the event ends.
Thoughtful Details Don’t Have to Be Expensive
What starts as thrifted glassware can become:
✨ personalized wedding decor
✨ custom party details
✨ memorable keepsakes
Proof that creativity and secondhand finds can make celebrations feel even more personal.
Because every item deserves a second chance.