
From Thrift to Rockabilly: Build Your Own Custom Festival Look
-2.png?sfvrsn=d79aee4_1)
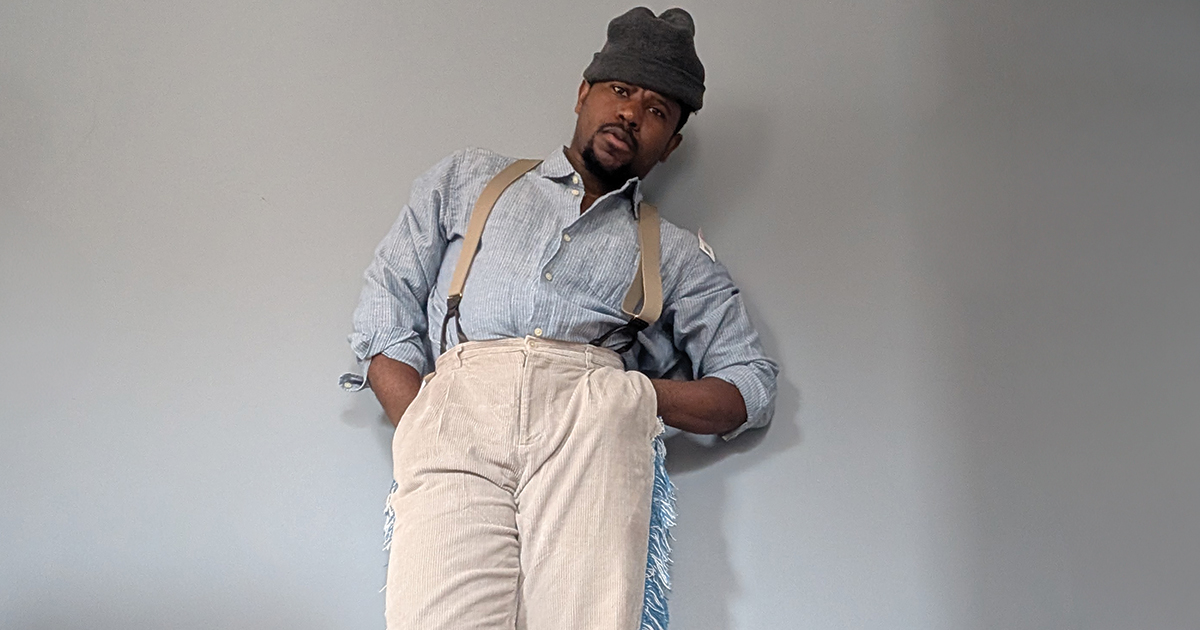
A little creativity, a few mistakes, and a whole lot of audacity.
The Vision: Rockabilly, But Make It Yours
If you’ve ever wanted to build a full outfit from thrifted pieces—and actually make it feel like you—this is your sign.
A rockabilly-inspired look is all about attitude: structured, a little vintage, a little rebellious. But the goal isn’t to look like a costume. It’s to make it personal.
And the best place to start? Goodwill.
Because it’s not about finding something perfect—it’s about finding something with potential.
What You'll Need:
- Thrifted pants (corduroy or structured fabric works great)
- Statement fabric (blanket, patterned textile, etc.)
- Sewing machine
- Needle + thread
- Sewing scissors
- Clips or pins (pro tip: thicker fabric = clips win)
- Optional: patches, pins, accessories
Step 1: Thrift the Foundation
Start by building your base.
Look for pieces that match the vibe:
- Structured shirts with movement
- Pants that can be tailored
- Statement accessories (like suspenders)
- Shoes that ground the look
Not everything needs to fit perfectly right away. In fact, it’s better if it doesn’t.
You’re not just shopping—you’re sourcing.
Step 2: Tailor It to You
This is where the transformation really begins.
If your pants don’t fit quite right—good. That means you can make them yours.
Using basic tools like:
- Sewing scissors
- A sewing machine
- Needle and thread
- Pins or clips (pro tip: thicker fabrics like corduroy = clips > pins)
You can:
- Open the waistband
- Adjust the fit through the back
- Reshape the silhouette
- Reattach belt loops
- Add interior buttons for suspenders
Will it work perfectly the first time? Probably not.
You might redo a seam. Or three.
That’s part of it.
Step 3: Experiment (and Mess Up a Little)
Here’s the truth: the best looks don’t come together in one try.
You’ll test things.
You’ll adjust.
You might completely change direction halfway through.
And honestly? That’s where the magic happens.
As seen in the video, even the process itself has its moments—figuring out what works, what doesn’t, and when to just pause and try again.
Because sometimes, the biggest skill you need is just the audacity to keep going.
Step 4: Add Custom Details
Now it’s time to make it stand out.
Take a statement fabric—like a thrifted blanket—and start experimenting:
- Cut it into strips
- Test different placements
- Play with texture and movement
Once you find what works, secure it:
- Create fringe or layered detailing
- Sew it into seams for a cleaner finish
This is where your outfit goes from “styled” to completely one-of-a-kind.
Step 5: Own the Look
At some point, you stop tweaking—and start wearing.
What started as “this doesn’t fit” becomes a fully custom, festival-ready look.
And the best part?
You built it yourself.
Because great style isn’t about how much you spend—it’s about what you create.
Watch the Full Process
Want to see how it all comes together—including the trial, error, and real-time adjustments?
Check out the full video with our newest content creator Gregory a.k.a @uncle.greg.be.stitchin for a behind-the-scenes look at the process (yes, including the moments where things didn’t go as planned).
Final Thought
You don’t need to be perfect.
You don’t need expensive tools.
You just need:
- An idea
- A little patience
- And the confidence to try
Because sometimes?
It really is just about the audacity.