Star-Crossed Vase: A Thrifted DIY Written in the Stars
-2.png?sfvrsn=d79aee4_1)
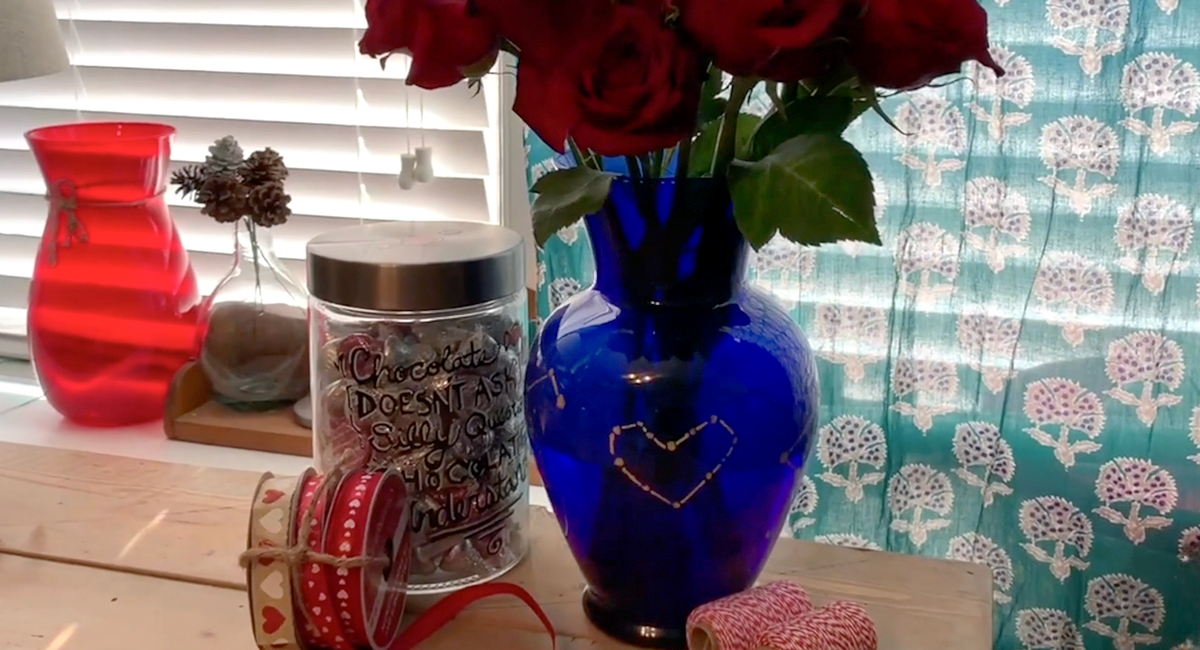
Turn a secondhand glass vase into a meaningful and personalized constellation design with a little creative magic.
Some gifts are pretty.
Some gifts are personal.
This one’s both.
With just a thrifted vase, a gold paint pen, and a little stargazing inspiration, you can create a constellation design that’s totally one-of-a-kind — whether it’s your zodiac sign, your partner’s, or even a custom heart in the stars.
It’s simple, meaningful, and feels way more thoughtful than anything off a store shelf.
Let’s make it ✨
What You’ll Need
- Thrifted glass vase (any shape works!)
- Gold paint pen or glass-safe acrylic paint
- Small detail brush
- Paper towel + rubbing alcohol (for cleaning)
- Printout or screenshot of your constellation(s)
- Dishwasher-safe Mod Podge (for sealing)
- Wide flat brush (for sealer)
- Fresh flowers
Quick paint tip
For glass, look for:
- Oil-based paint pens (like Sharpie Oil-Based or DecoColor) or
- Acrylic enamel / multi-surface paint
These stick better to slick surfaces and last longer than regular craft paint.
Step 1: Find Your Stars
Start by choosing your constellations.
Look up:
- Your zodiac sign
- Your partner’s sign
- Or any shape that feels meaningful (a heart, initials, a special date)
Save or print a simple star map so you can reference the dot placement while you work.
Pro tip: Keep it nearby on your phone or taped to your table for easy glancing.
Step 2: Clean Your Vase
Before painting, make sure the glass is completely clean.
Wipe it down with:
- soap and water first
- then rubbing alcohol
This removes oils and helps the paint stick.
Let it dry fully.
Step 3: Dot Your “Stars”
Using your gold paint pen, lightly place small dots wherever each star would go.
Don’t draw lines yet — just dots.
Think of this like connecting the stars in the sky:
map first, lines later.
Take your time here. Getting the placement right makes everything easier.
Step 4: Connect the Constellations
Now grab your detail brush (or the fine tip of your pen) and carefully connect the dots.
Draw thin lines between each star, following your reference.
If you want the lines to pop:
- retrace them once or twice for a richer gold finish
Slow and steady is the move here.
Step 5: Make It Yours
This is where the magic happens.
Add a little creative license:
- a tiny heart constellation
- your anniversary date in dots
- extra stars for sparkle
- initials or a mini pattern
Constellations are basically storytelling with dots — so tell yours.
Step 6: Fix Mistakes (because they happen!)
If you slip or want to redo a line:
While wet:
- wipe gently with a damp cotton swab or paper towel
After dry:
- carefully scrape with a fingernail or craft blade
- or touch up with more paint
No stress — glass is forgiving.
Step 7: Seal Your Design
Once fully dry, seal your artwork for durability.
Using a wide flat brush:
- apply 1–2 thin coats of dishwasher-safe Mod Podge
- brush only over the design area (not the whole vase)
Let each coat dry completely before adding the next.
Even with sealer, hand washing is still recommended to keep your stars shining longer.
Step 8: Add Flowers & Style
Now the fun part.
Add fresh flowers, set it on a table, or gift it to someone you love.
It’s simple, but it feels special — like you made something just for them.
Because you did.
Why We Love This DIY
We’re big fans of starting with secondhand pieces for projects like this.
A thrifted vase:
- costs less
- keeps things out of landfills
- and gives you total creative freedom
Plus, it already has a story — you’re just adding the next chapter.
Try it yourself
Next time you’re at Goodwill, keep an eye out for glass pieces with interesting shapes. You never know which one might be your next canvas.
A little paint. A few stars. Something meaningful.
That’s the good stuff 💛
Follow the video tutorial -->