How to Turn a Thrifted Vase into a Valentine’s Dot-Painted Design
-2.png?sfvrsn=d79aee4_1)
A simple DIY that transforms secondhand glass into a personalized gift or décor piece
A handmade gift often feels more meaningful than something purchased off the shelf. With a few basic supplies and a thrifted glass vase, Cheryl The Dotting Chick shows how you can create a custom dot-painted design that’s perfect for Valentine’s Day or everyday décor.
Dot painting is beginner-friendly, affordable, and easy to customize. Starting with a secondhand vase also keeps costs low while giving new life to an existing piece.
Follow these steps to create your own.
Step 1: Choose and Prepare Your Vase
Select a vase with a smooth, clean surface. Simple shapes work best for painted designs.
Before painting:
- Wash thoroughly with soap and water
- Wipe with rubbing alcohol to remove residue or oils
- Allow the surface to dry completely
Proper prep helps paint adhere evenly and prevents smudging.
Step 2: Gather Your Materials
Supplies:
- Dotting tools or styluses in various sizes
- Acrylic or multi-surface paint (glass-safe or enamel recommended)
- Small detail brush
- Painter’s tape (optional)
- Flow medium (if paint needs thinning)
- Cotton swabs or wet wipes for touch-ups
- Sealant (spray or brush-on, matte or gloss)
Oil-based or multi-surface paints typically adhere best to glass.
Step 3: Create the Base Dots
Start with a foundation layer using white paint.
- Dip the tool into the paint
- Press straight down onto the surface
- Re-dip between each dot for consistent size
Arrange dots in small clusters around the vase. Leave space between them to keep the design clean and balanced.
Allow this layer to dry completely before adding color.
Step 4: Add Color and Dimension
Once dry, layer additional colors inside each dot.
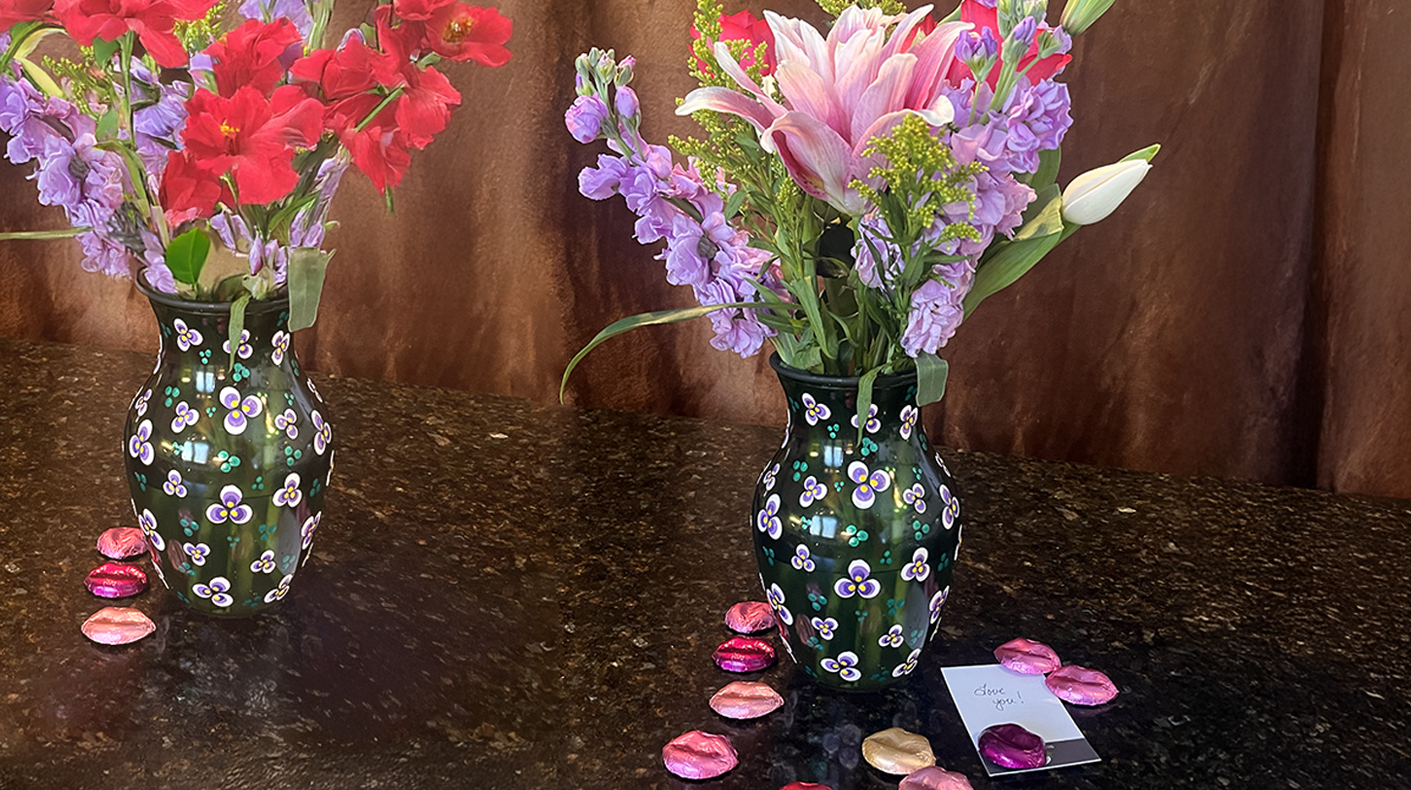
For a floral-inspired look:
- Add a lighter purple dot inside the white
- Follow with a darker purple
- Finish with a small yellow dot in the center
Each layer should be slightly smaller than the last to create depth.
Step 5: Add Details and Foliage
Use green paint to add small dots around the florals to mimic leaves and movement. Vary the sizes and placement to create a natural look.
This helps balance the composition and fill empty space.
Step 6: Correct Any Mistakes
If paint is still wet, gently wipe away errors with a damp cotton swab.
Once dry, small areas can be covered with additional paint or lightly scraped and repainted.
Step 7: Seal the Design
Allow the vase to dry fully (up to 24–48 hours).
Apply:
- Two light coats of sealant
- Let each coat dry thoroughly
Sealing protects the design and improves durability. Hand washing is recommended to preserve the finish.
Customize Your Design
This technique works with any color palette or pattern. Try:
- Valentine’s-inspired colors
- Abstract dots
- Floral patterns
- Minimal metallic accents
Adjust the design to match your style or the occasion.
Why Start with Secondhand?
Using a thrifted vase is an easy way to save money, reduce waste, and experiment creatively. Secondhand pieces offer unique shapes and textures that make each finished project one of a kind.
With a little paint and time, a simple find can become something personal and meaningful.
Check out The Dotting Chick and follow her helpful tutorial! Share your creativity with us.